在本章中,我们将研究如何 Backup & Restore 在WordPress中恢复文件和数据库。 在WordPress有两个部分的备份,如
- WordPress Files Backup
- WordPress Database Backup
- WordPress Files Restore
- WordPress Database Restore
WordPress文件备份 #
要获取WordPress的备份文件,您需要在系统上安装FileZilla Client。
以下是用于WordPress中的文件备份操作的简单步骤 –
步骤(1) – 打开FileZilla客户端,如下面的屏幕截图所示。
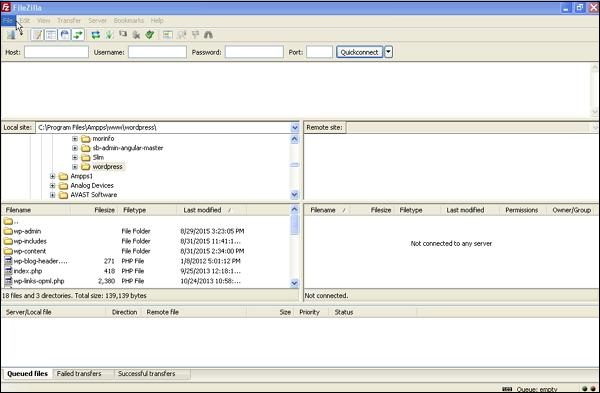
步骤(2) – 输入您用于登录cPanel的主机,用户名,密码和端口。
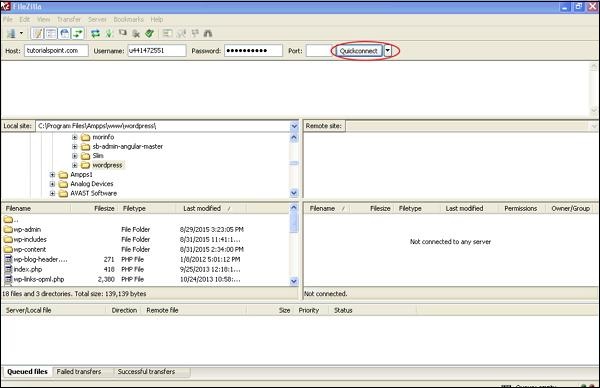
填写所有字段后,点击Quickconnect 按钮。
步骤(3) – 您将在右侧看到WordPress网站的所有文件和文件夹,如下面的屏幕所示。
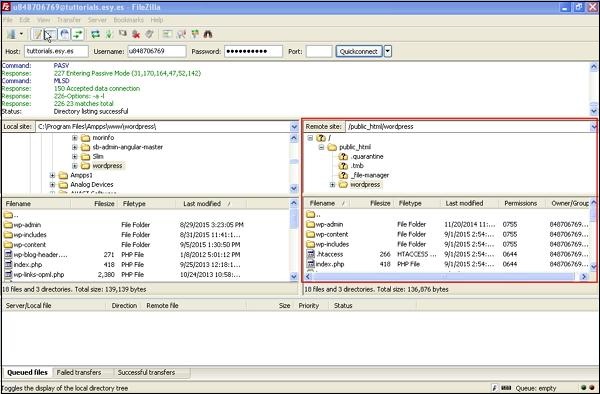
步骤(4) – 选择所有文件和文件夹,右键单击鼠标,然后单击Download。
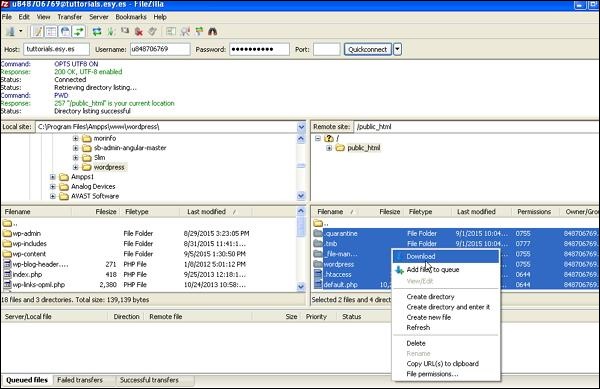
从cPanel下载WordPress文件后,它将被保存在您的系统上。
WordPress数据库备份 #
以下是在WordPress中的数据库备份的简单步骤 –
步骤(1) – 在浏览器中输入路径 http:// localhost / phpmyadmin 。 您将获得以下屏幕。
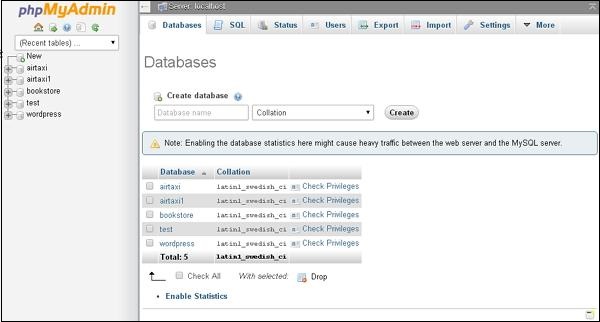
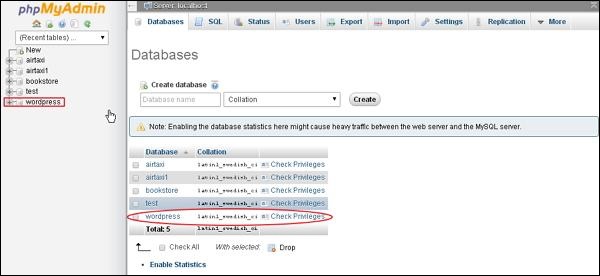
步骤(2) – 点击您为WordPress创建的数据库名称“wordpress”。
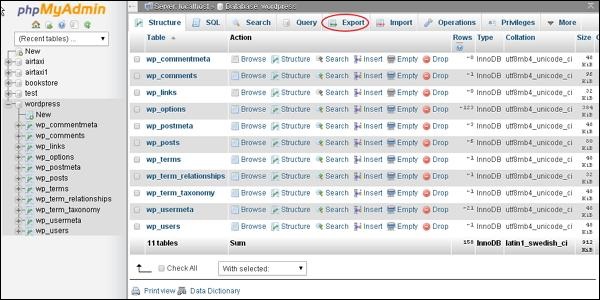
步骤(3) – 点击数据库 wordpress 后,将打开以下页面。 点击Export标签。
步骤(4) – 您将获得两种导出数据库的方法,即快速和自定义。 选择任一方法,然后单击Go按钮。
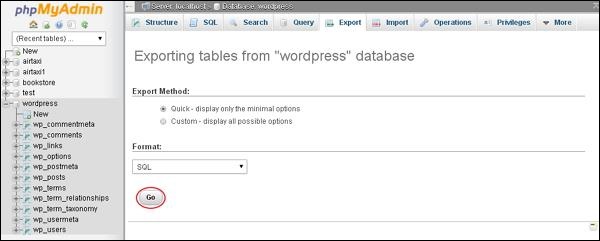
导出数据库文件后,它将保存在您的系统上。
还原WordPress文件 #
以下是简单的步骤,用于恢复WordPress中的文件使用ftp –
步骤(1) – 打开FileZilla Client,并使用ftp登录您的网站,如下面的屏幕所示。
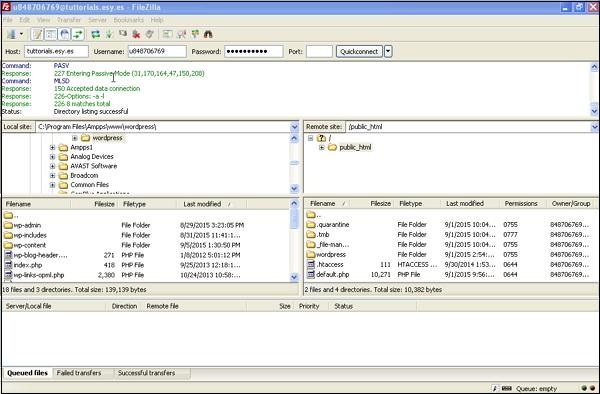
步骤(2) – 在ftp中打开本地目录,并将所有WordPress文件上传到您的网站,如下所示。
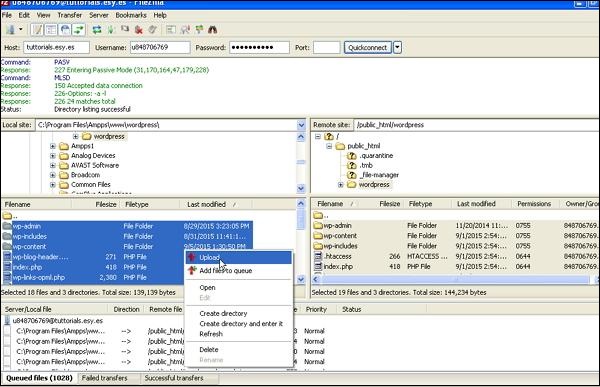
步骤(3) – 然后,找到your wordpress folder → wp-config.php文件。 在编辑之前复制和重命名wp-config.php文件,如果有一些错误,您可以恢复此文件。
打开wp-config.php文件并找到以下代码。
define('DB_NAME', 'db_name');
将db_name替换为您创建的数据库名称。
define('DB_USER', 'db_user');
使用您的用户名MySql替换db_user。
define('DB_PASSWORD', 'db_password');
使用您的密码MySql替换db_password。
编辑后保存您的wp配置文件,并通过ftp上传到您的WordPress网站。
还原WordPress数据库 #
以下是用于在WordPress中还原数据库的步骤 –
步骤(1) – 在浏览器中输入路径 http:// localhost / phpmyadmin 。 将弹出以下屏幕。
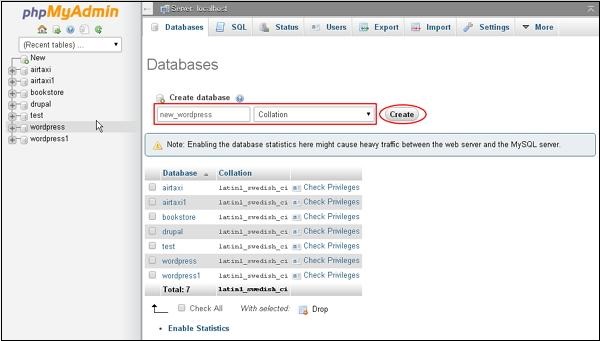
您可以创建新数据库或在现有数据库中导入备份。
在这里,我们将创建一个新的数据库名称,即 new_wordpress ,然后点击new_wordpress按钮。
步骤(2) – 您可以查看您创建的数据库,如下面的屏幕所示。 点击数据库名称 new_wordpress 。
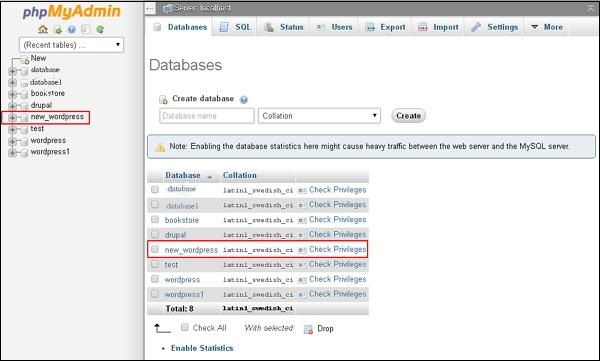
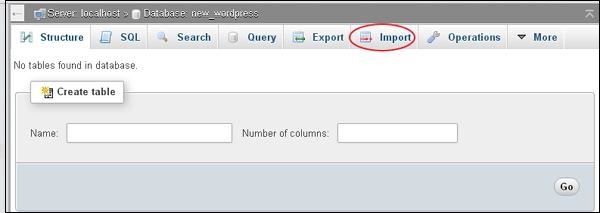
步骤(3) – 点击Import。
步骤(4) – 点击选择文件按钮从系统中选择备份文件。 上传sql文件后,选择格式为 SQL ,如以下屏幕所示。
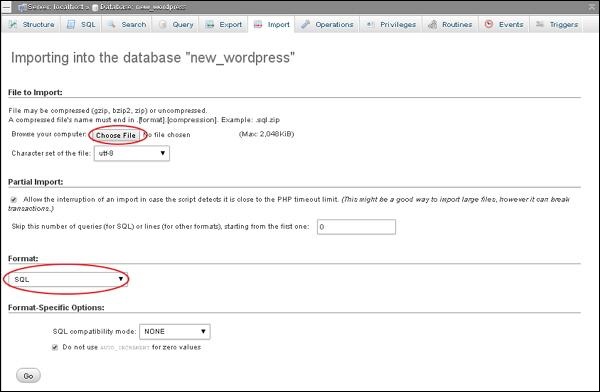
点击Go按钮。
步骤(5) – 一旦点击Go,您将在sql文件上传成功后收到一条消息。


