在本章中,我们将研究如何在WordPress中添加媒体文件。 WordPress允许您添加,所有类型的媒体文件,如视频,音频和图像。
以下是添加媒体的步骤。
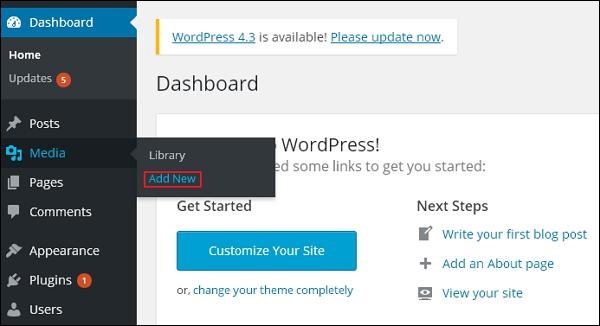
步骤(1) – 点击WordPress中的Media → Add New。

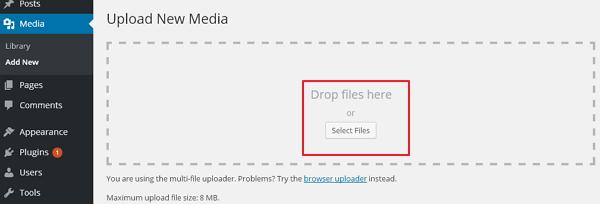
步骤(2) – 然后,点击Select Files选项,从本地存储中选择文件,如下图所示。

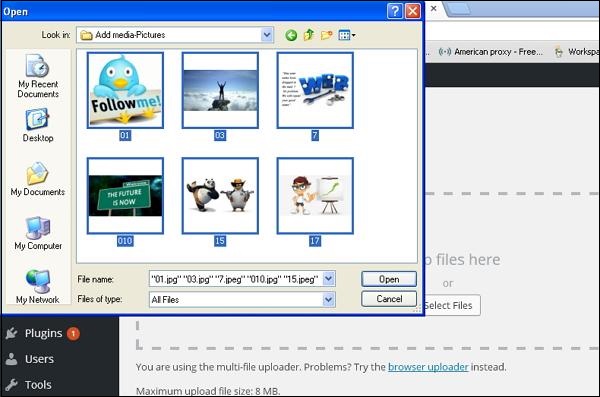
步骤(3) – 选择并添加Media files(如图片和音频),然后点击打开,如下图所示。

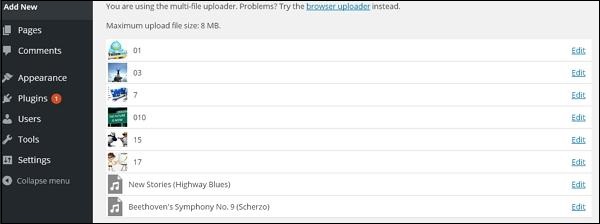
步骤(4) – 您可以查看添加的media files列表,如下面的屏幕截图所示。


